Guide
Welcome to Cut Plan Optimizer
You can use it in two ways. Pick the one that suits your work.
Way 1
The Quick Way
You already have the panel sizes. Enter or import them, then get an optimized cut plan.
See the steps →Way 2
Full Utilization
Enter only the cabinet size. The panel sizes and the cut plan are worked out for you.
See the steps →Way 1
The Quick Way
Use this when you already know the size of every panel you need to cut.
- 1
Create a project
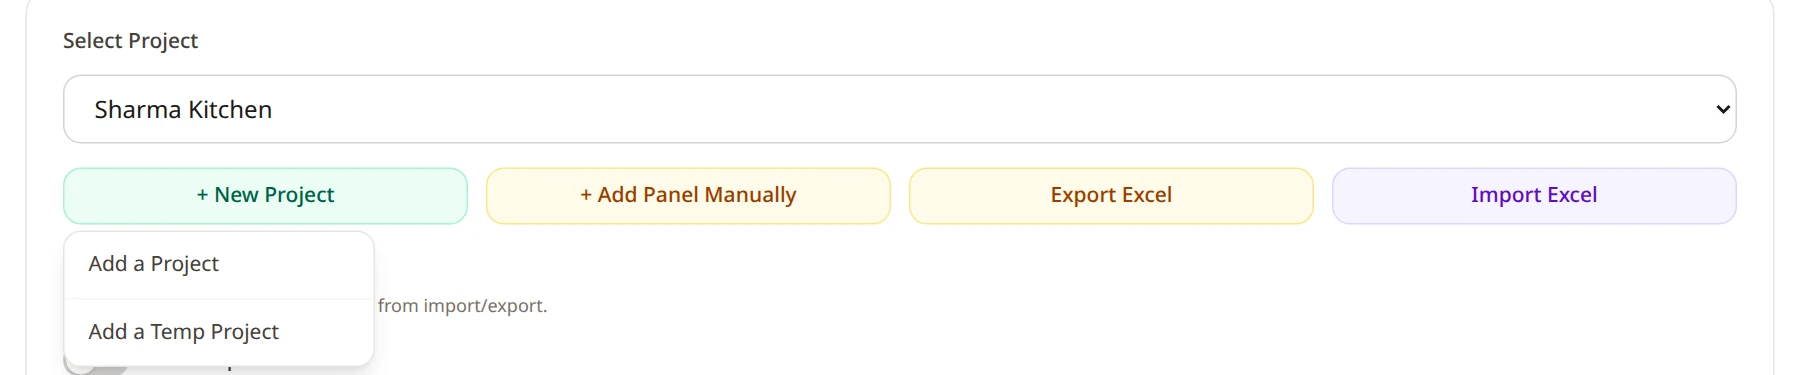
Click Panel Sizes in the main menu, then click + New Project. You will see two options:
- Add a Project saves the project and its sizes, so you can come back to it later.
- Add a Temp Project does not save the project. It stays active only for your current session.
- 2
Add your panel sizes
There are two ways to add panels. Use whichever is easier for you.
Option A: Type them in
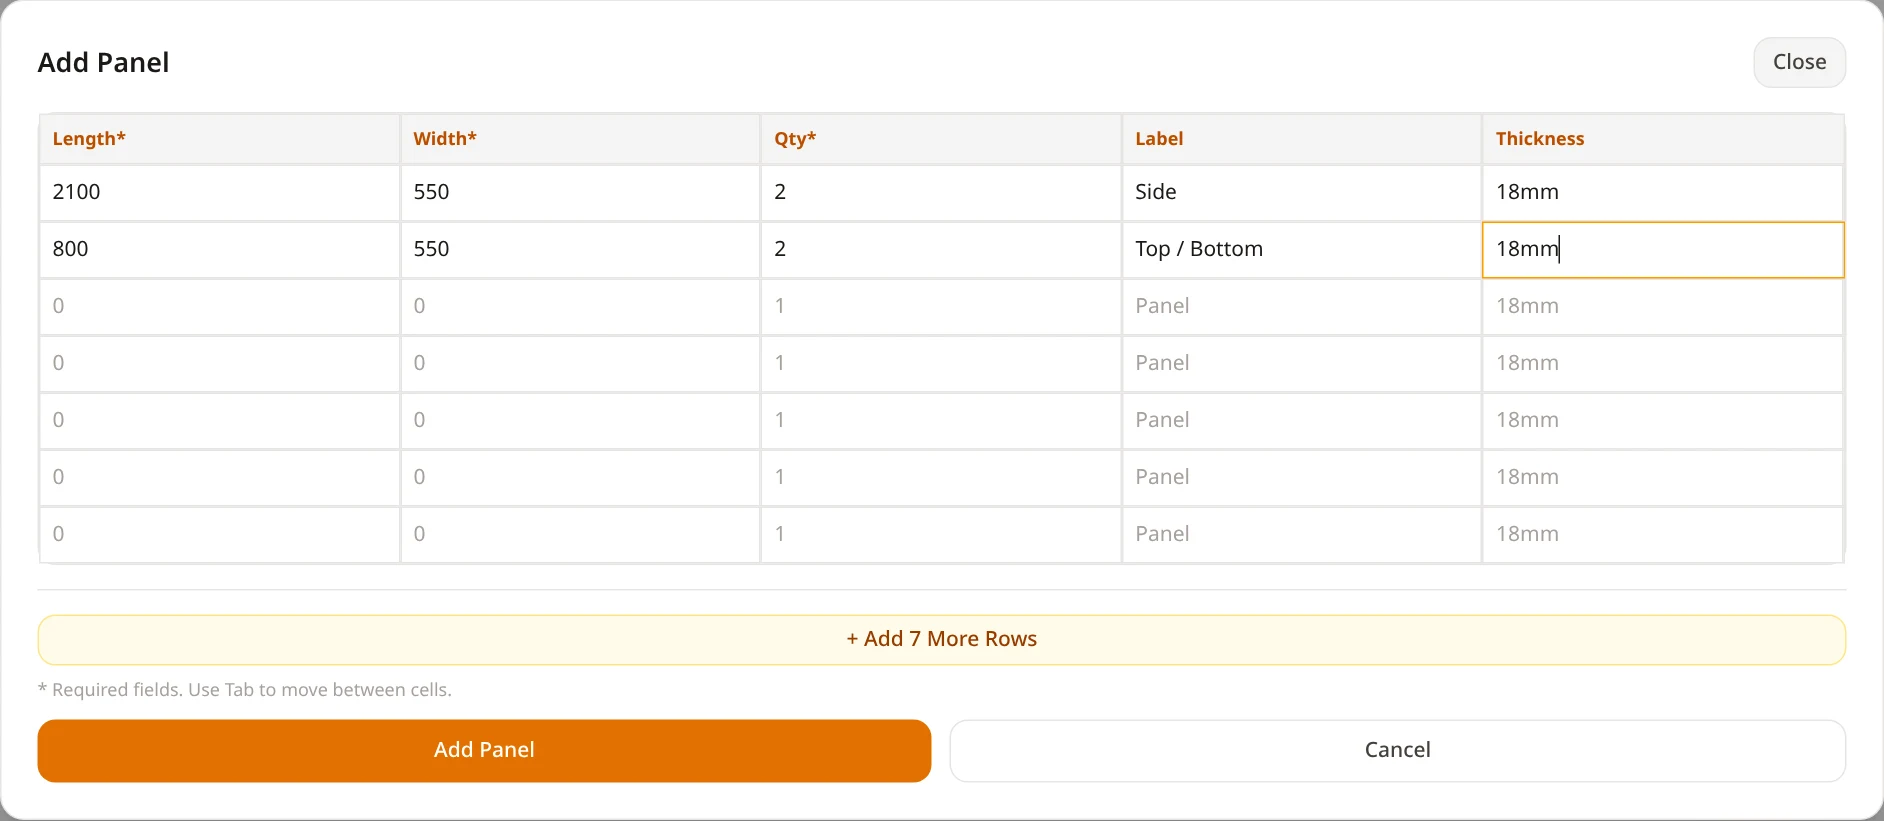
Click + Add Panel Manually. Fill in the length, width, quantity, label and thickness for each panel, then click Add Panel.
Option B: Use an Excel file
- Click Export Excel. You get an Excel file in the correct format.
- Fill in the sizes and save the file.
- Click Import Excel and choose your file. All the sizes are added to the project.
 Tip: Need grain direction, edge-band tape or mica? Turn on Grain direction, Mark Tape or Define Mica under the buttons. The Add Panel window and the Excel file then include those columns. In Excel they appear as drop-down lists.
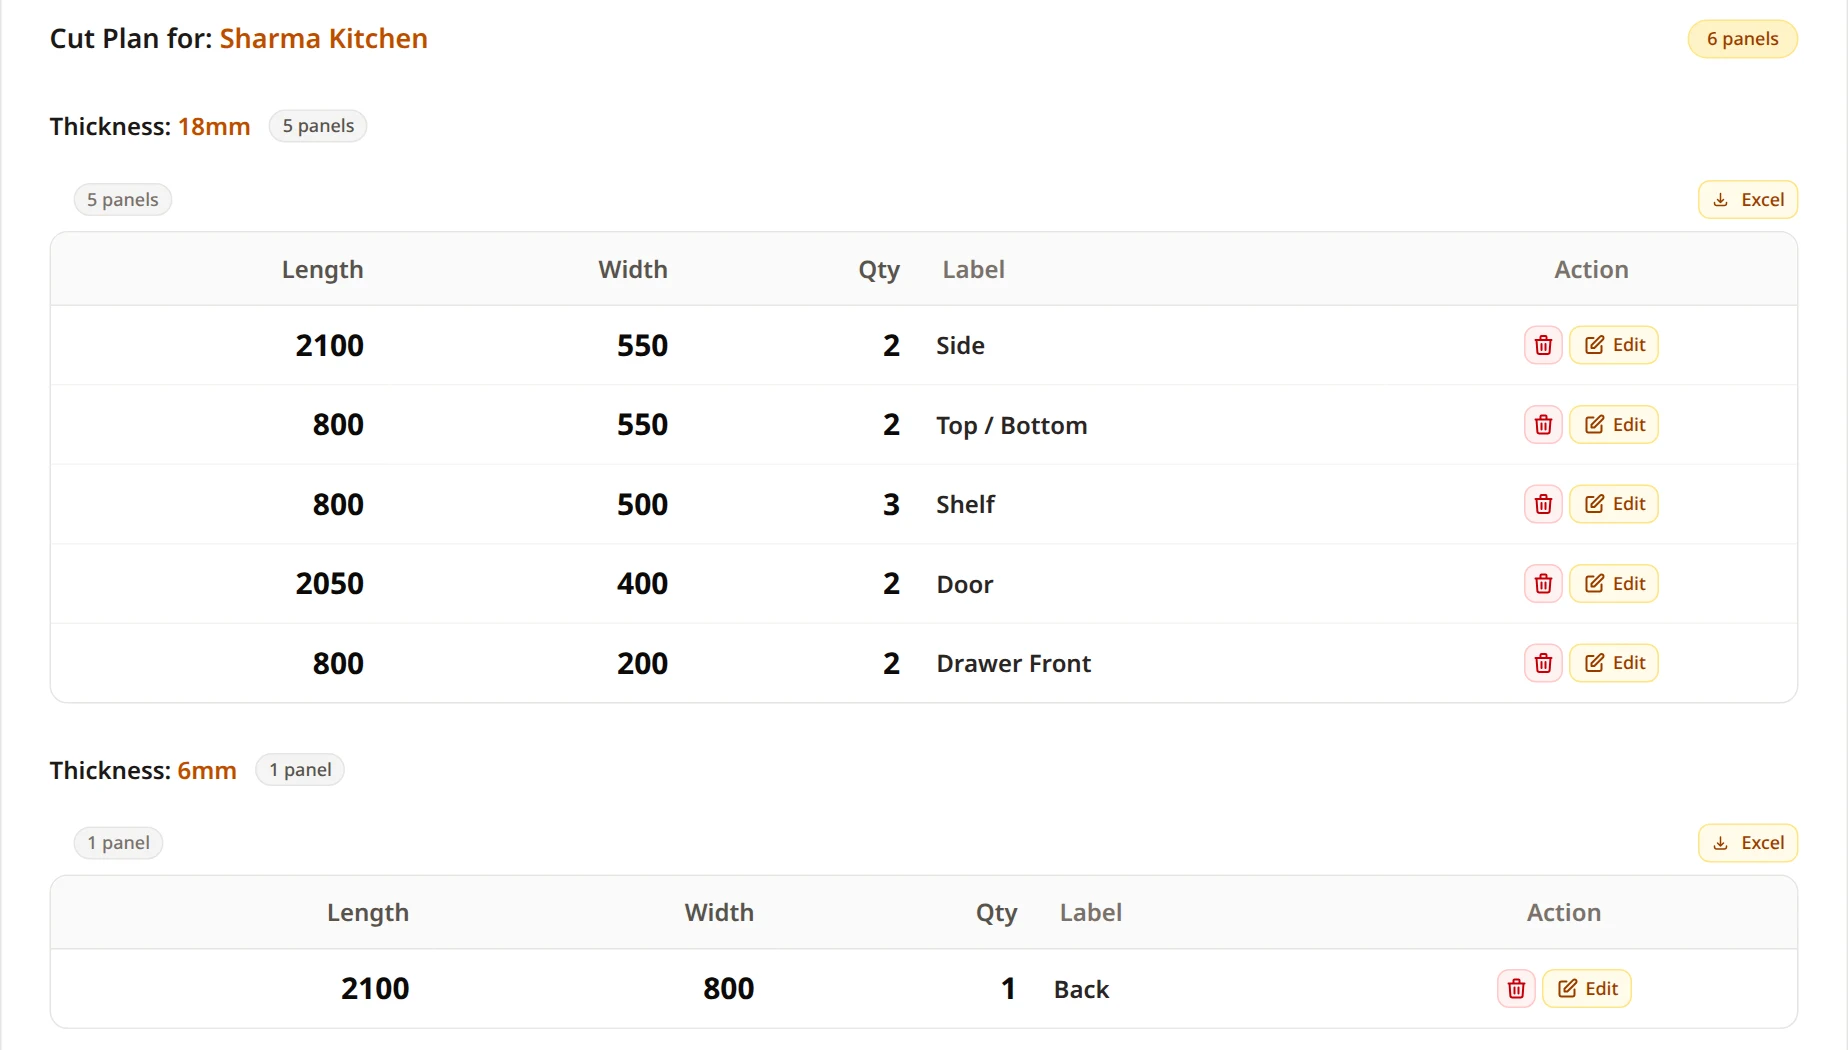
Your sizes are listed under the project, grouped by thickness. You can edit or delete any row.
- 3
Set up the Cut Optimizer
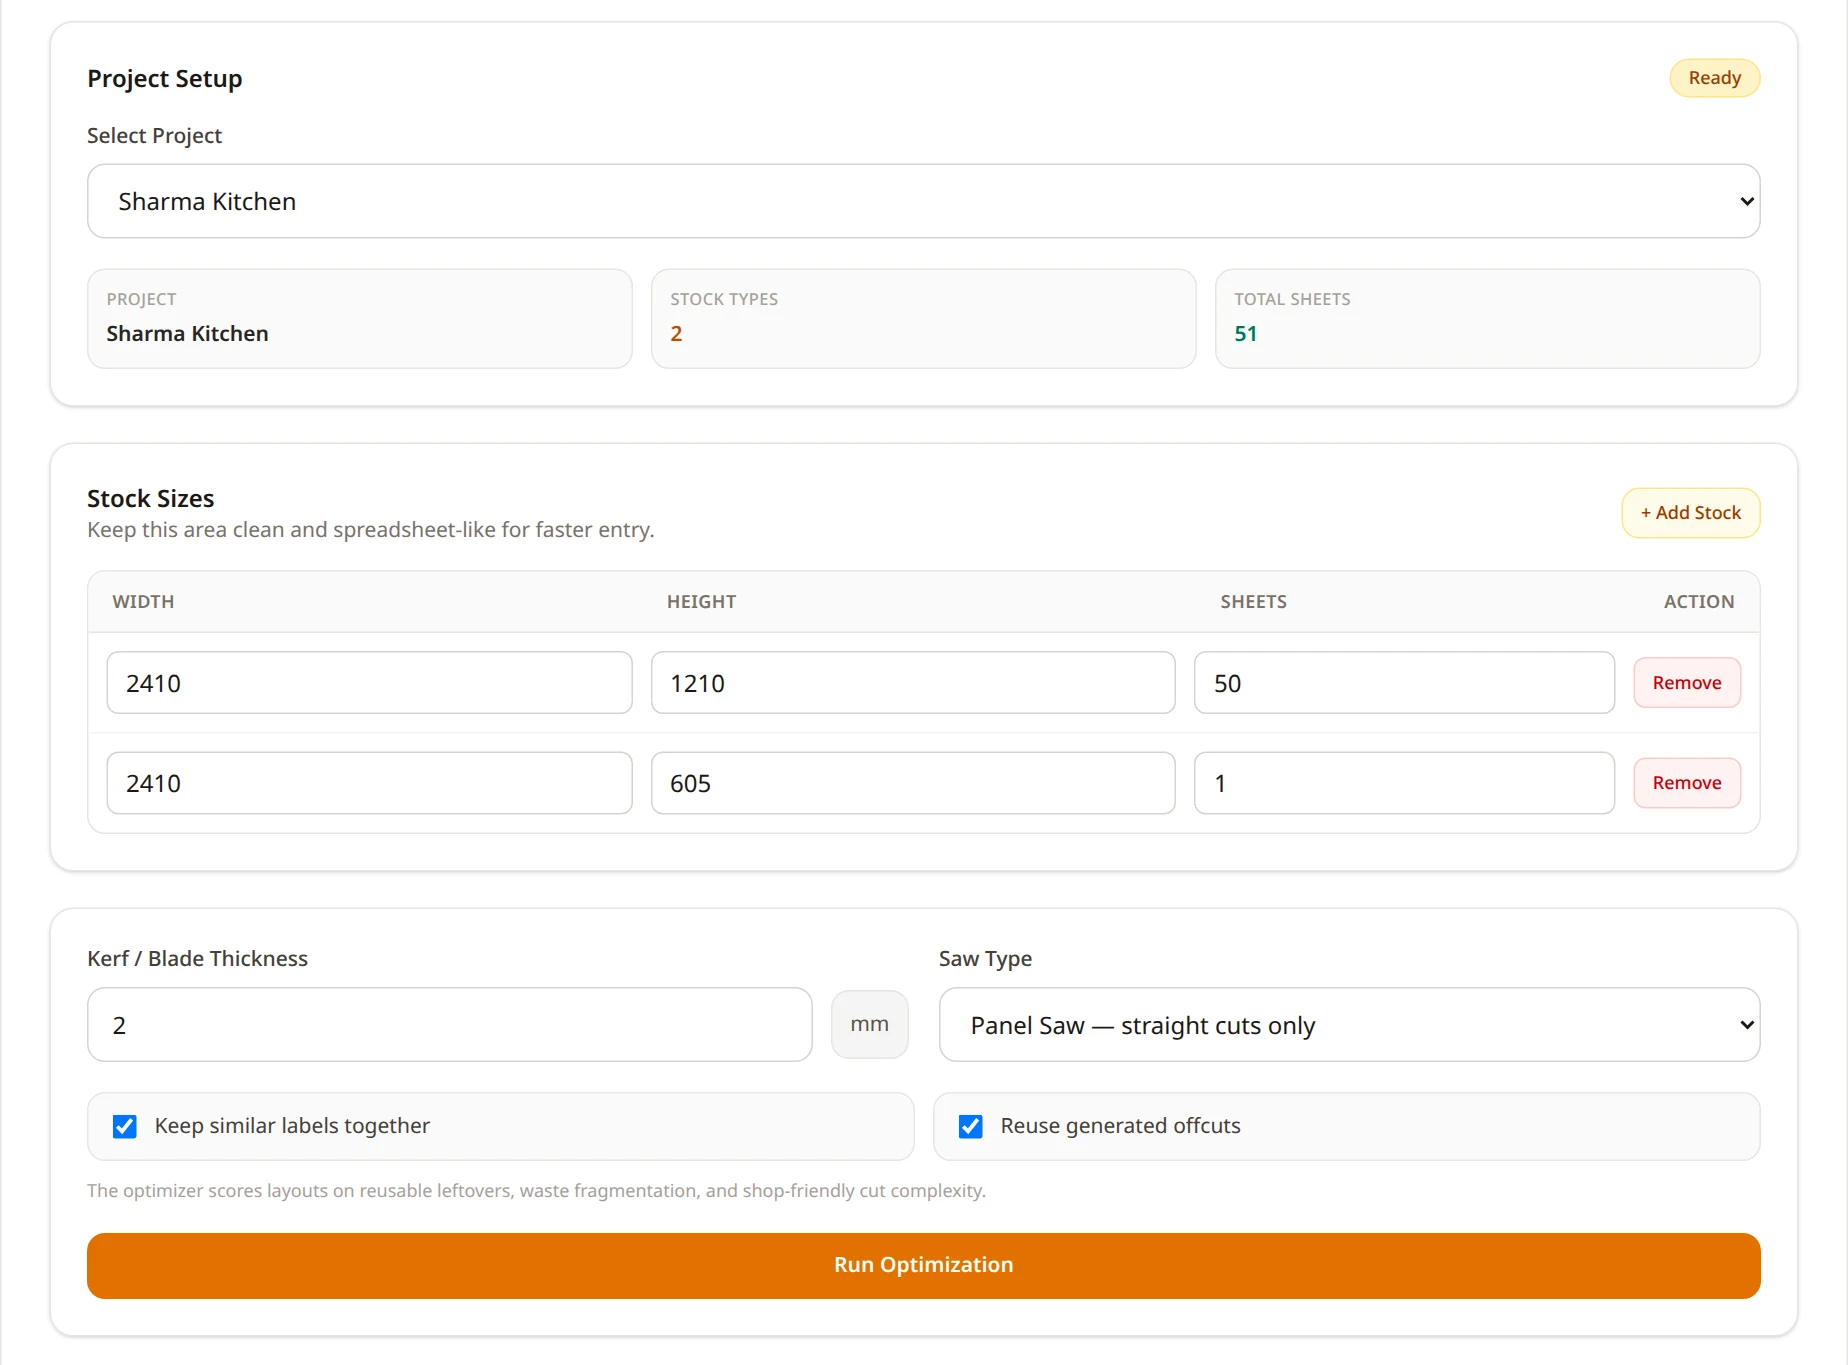
Once your sizes are in, click Cut Optimizer in the main menu (or the Go to Cut Optimizer button under your sizes).
- Select Project: choose your project from the first drop-down.
- Stock sizes: these are already filled in with common sheet sizes. Change them if your sheets are different.
- Kerf / Blade Thickness: the width of your saw cut. Adjust it if needed.
- Saw Type: choose one of two options.
- Panel Saw – straight cuts only. Use this if you cut on a panel saw.
- Tightest Fit. Uses the most of every sheet, but some cuts may need a router.
- 4
Run the optimization
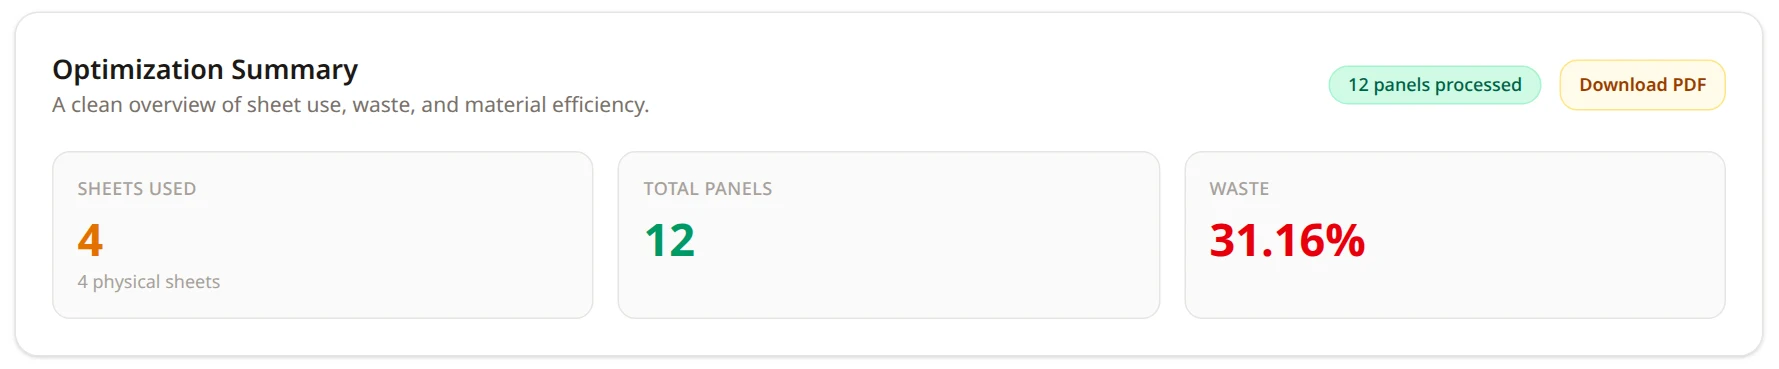
Click Run Optimization. You get a summary and a picture of every sheet, with the size and label of each panel.
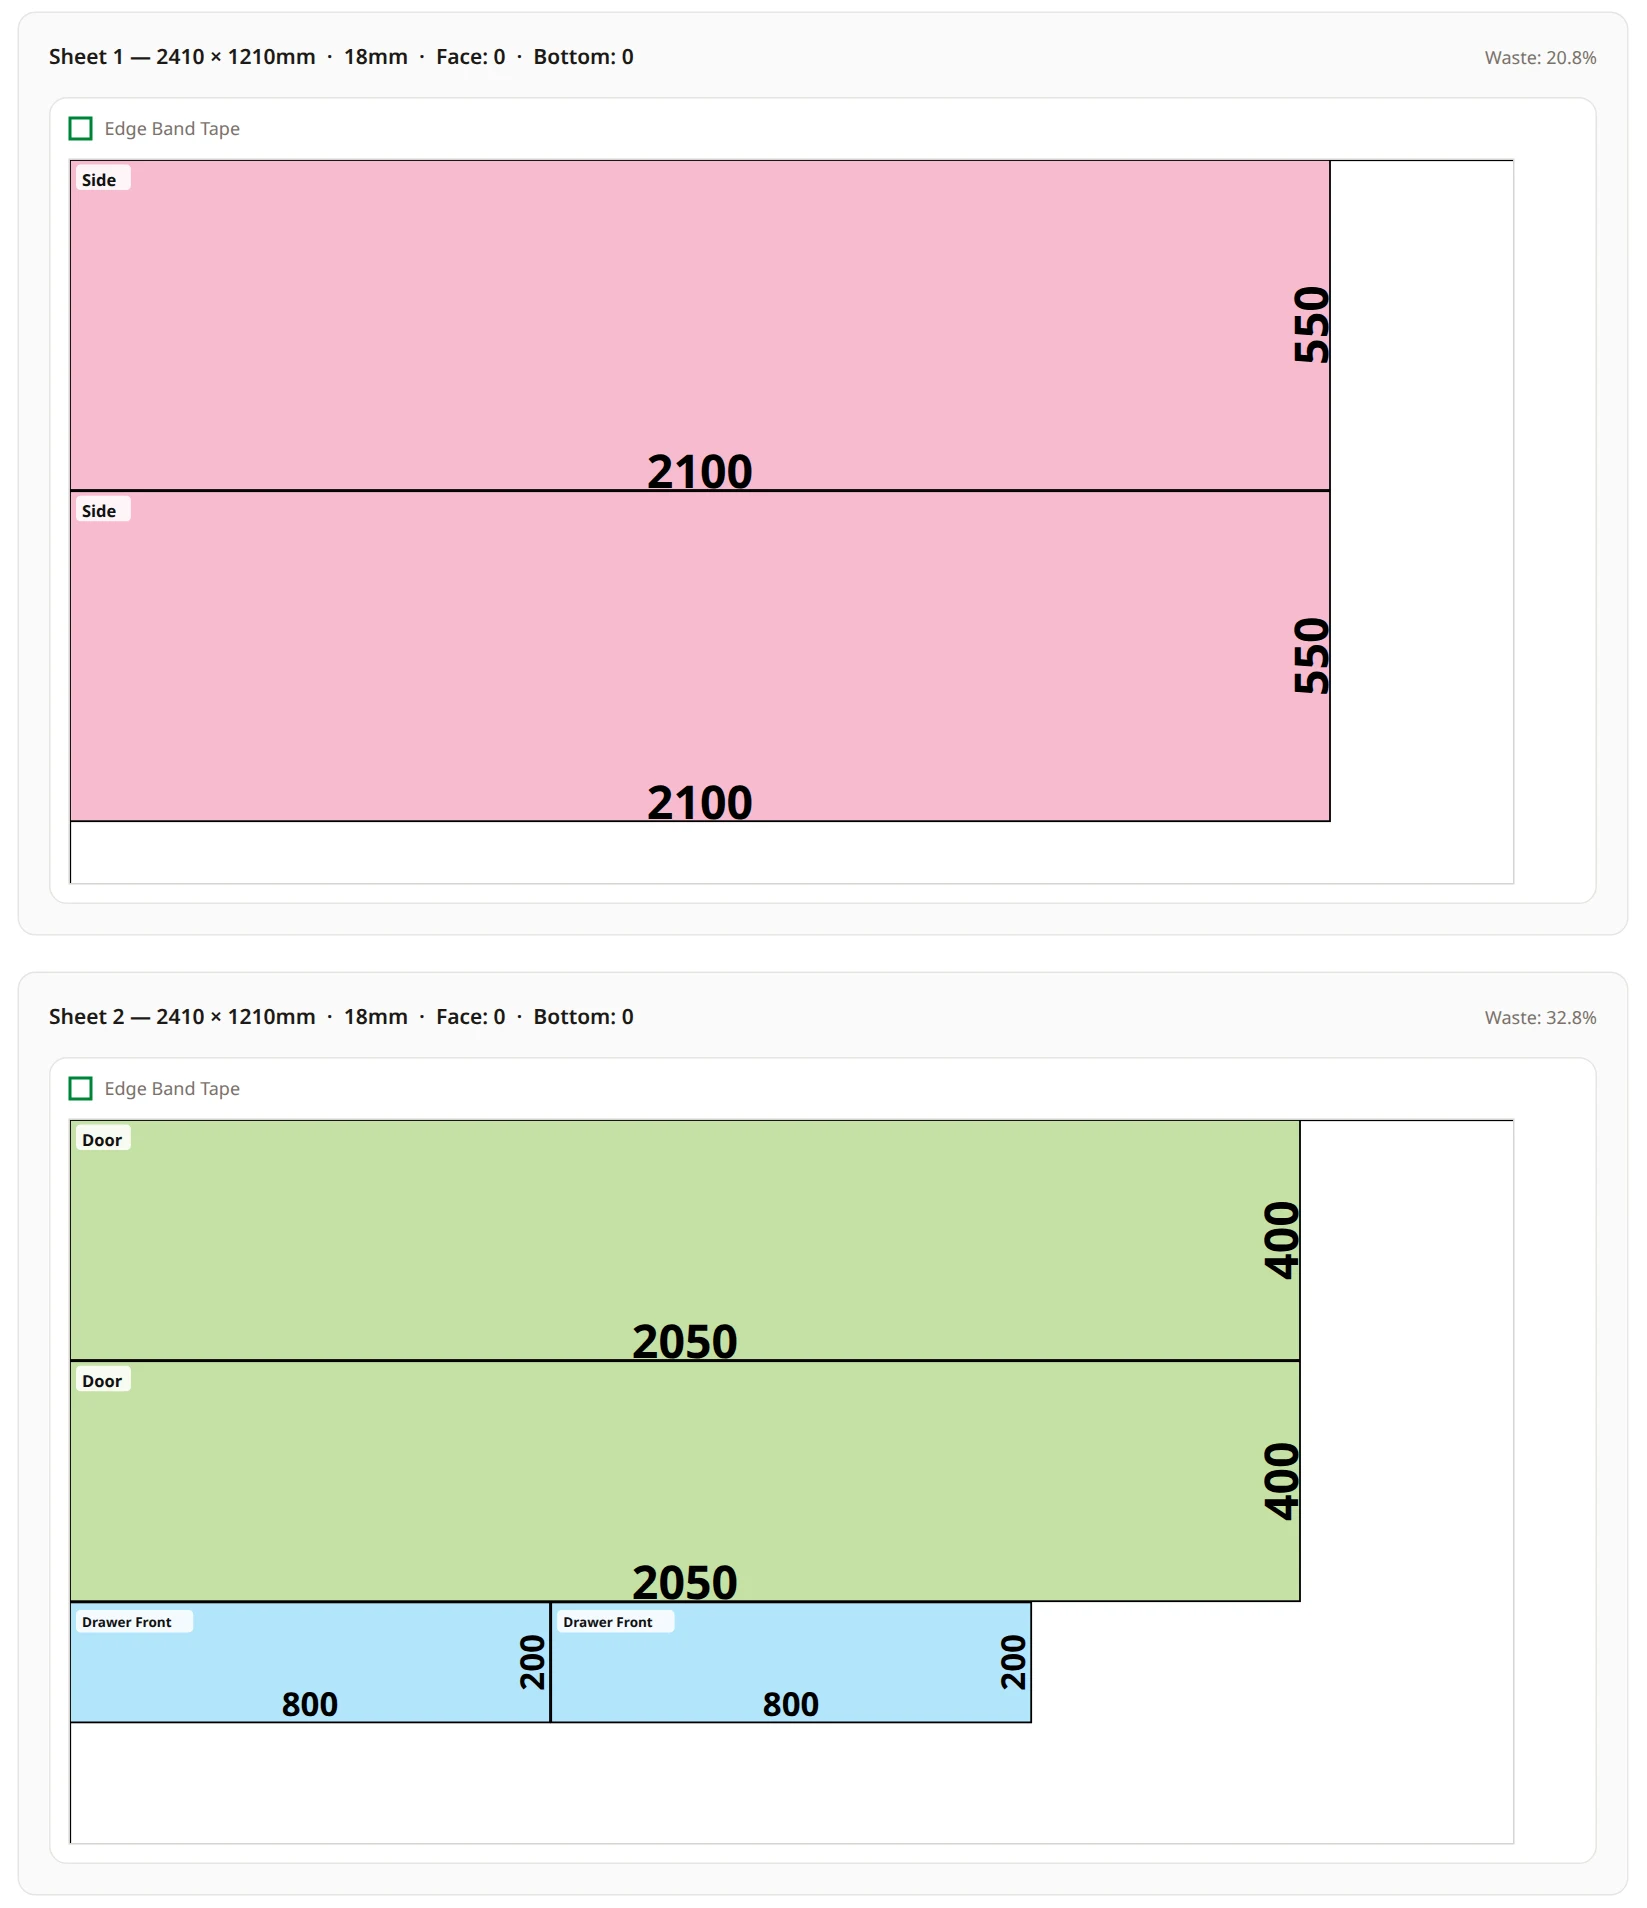
Each colored block is one panel, with its size shown on the sheet. If you marked edge banding, the edges that get tape are drawn right on the cut plan as green dashed lines.
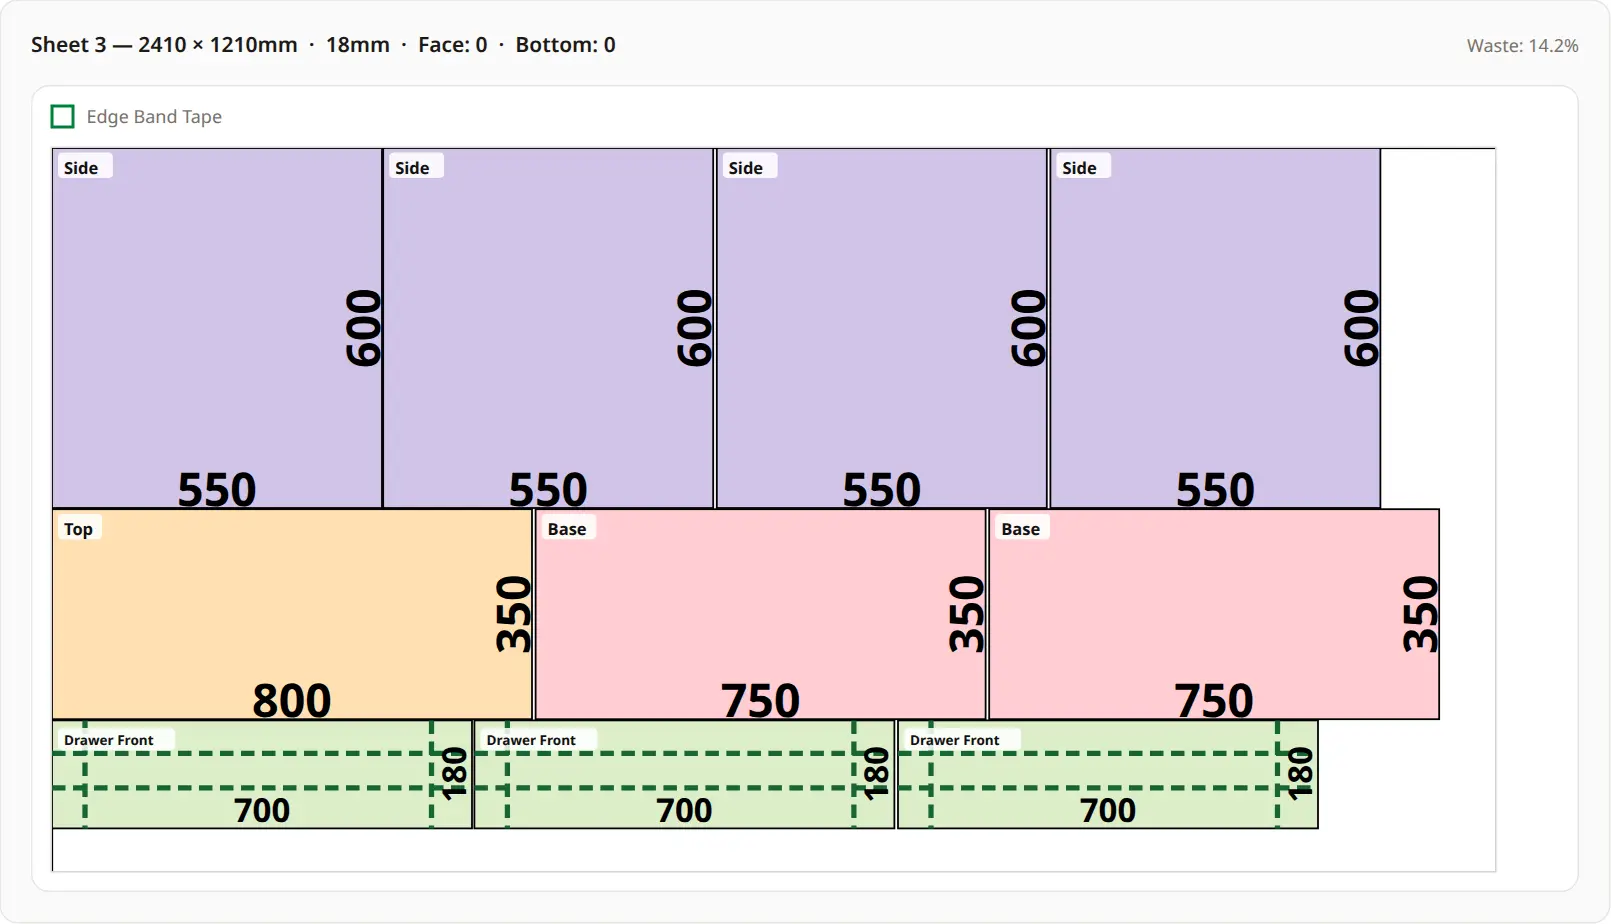
Green dashed lines show which edges get edge-band tape. - 5
Move panels between sheets (optional)
See a sheet with a lot of leftover space? You can move panels by clicking and dropping:
- Click a panel to pick it up. It sticks to your cursor.
- Click another sheet to drop it there.
The layout updates straight away.

Way 2
Full Utilization
Enter just the wardrobe size, and the cut plan is done automatically. It includes edge-band marking and the placement of panels on sheets. Yes, this is possible.
You may wonder what happens if you build different types of cabinets. That is what cabinet types are for.
- 1
Define a cabinet type
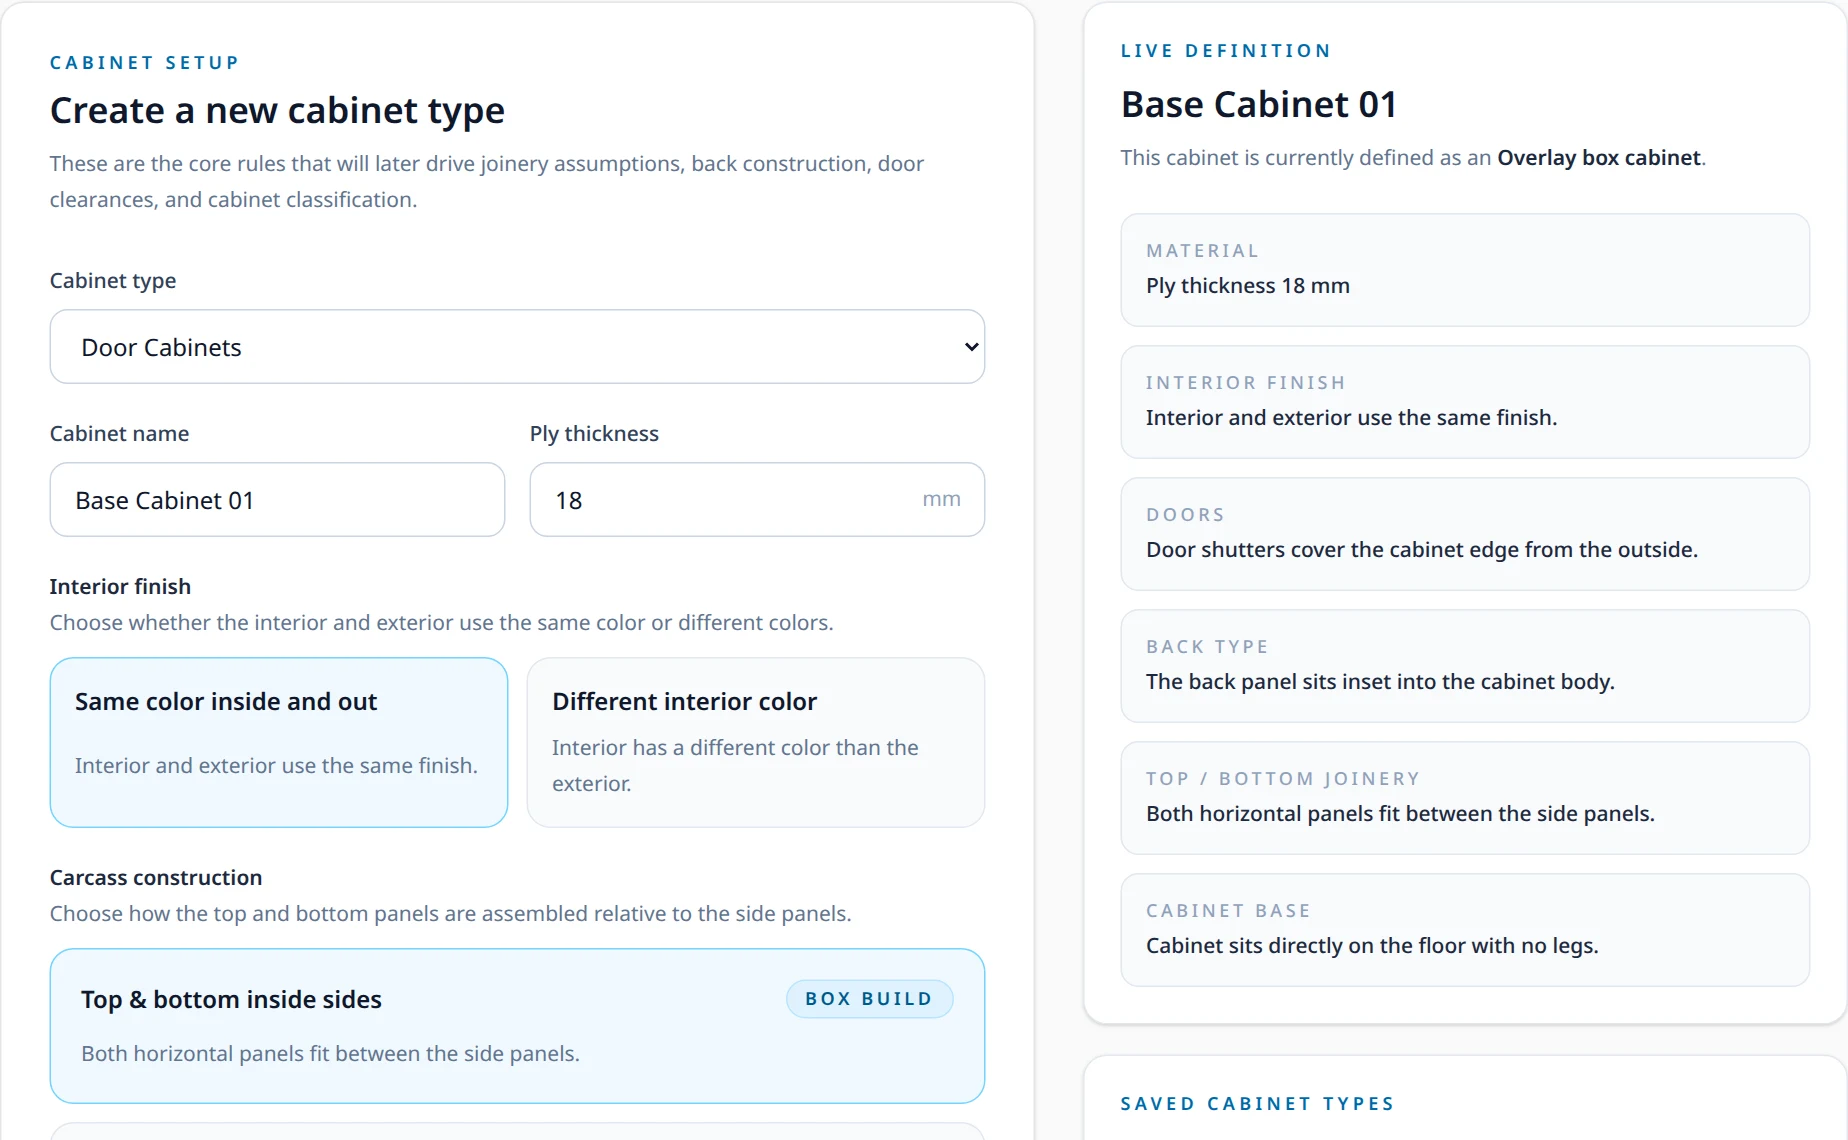
Click Define Cabinet in the main menu. Choose the options that describe how you build, such as ply thickness, whether doors are inset or overlay, the type of back panel, and how the top and bottom fit the sides. Then click Save cabinet type.
The cabinet type you save sets the rules for the cut plan. Define one for each way you build.
- 2
Create a project and add cabinets
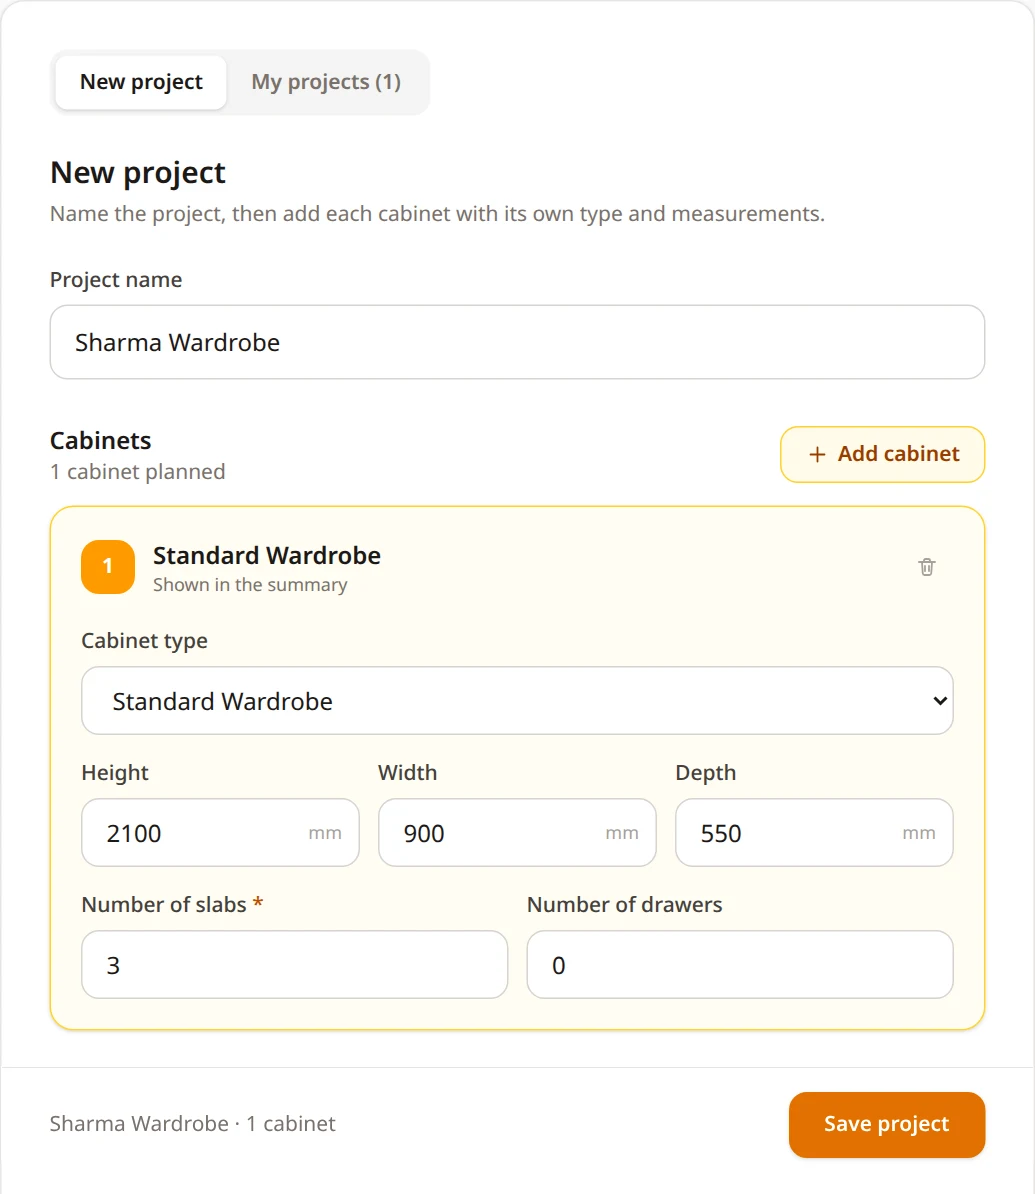
Go to the dashboard (click Cut Plan Optimizer at the top left). Give the project a name, then click Add cabinet for each cabinet. For every cabinet, choose its cabinet type (the ones you just saved are in the list) and enter its height, width and depth, plus the number of slabs and drawers. Click Save project.
- 3
Review the panels and optimize
The panel sizes are created for you. Open Panel Sizes to check them, then go to the Cut Optimizer and follow steps 3 to 5 of the Quick Way above.
Video Tutorials
Prefer to watch? These walkthroughs cover the same ground step by step.
Using Cut Plan Optimizer
Ready to try it?
Create a project and get your first cut plan in a few minutes.